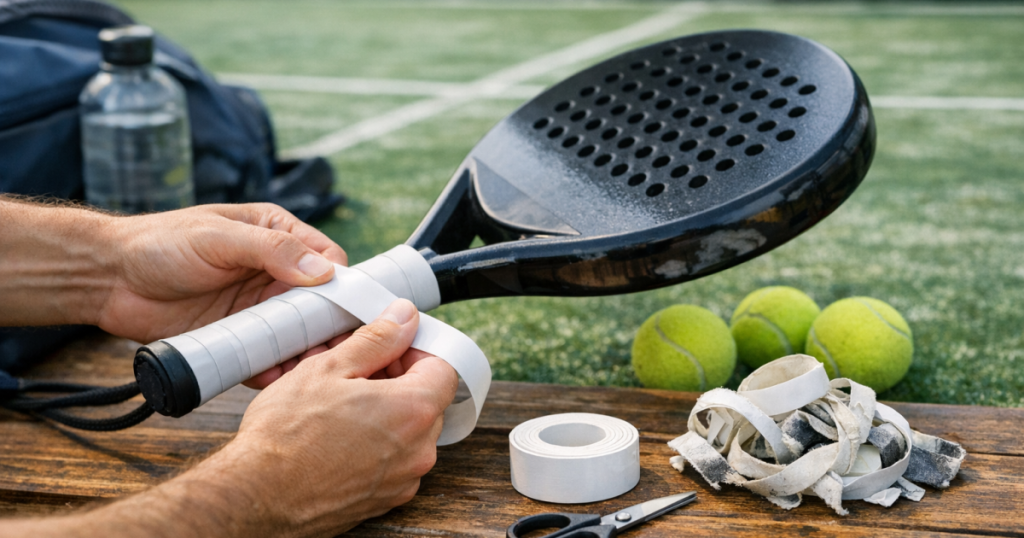
A grip that is too slick makes every volley feel rushed, even when your technique is fine. The quickest fix is to replace a padel overgrip carefully, so the new wrap feels secure without using extra tape, cutting off too much, or having to start again.
The good news: most waste comes from rushing the first wrap, pulling unevenly, or finishing in the wrong place. A tidy method takes only a few minutes once you know the order.
The quick method
Remove the old overgrip, clean any loose residue from the handle, start the new grip at the butt cap, wrap with light tension and a small consistent overlap, then trim and tape the end only once the handle feels even. Keep the backing on most of the grip until you need it, because exposed adhesive and tacky surfaces pick up fluff fast.
The aim is not to stretch the grip as far as possible. It is to create a smooth, repeatable layer that gives your hand confidence without making the handle bulky.
What you need before you start
- A fresh padel overgrip.
- The finishing tape that comes with it, or clean grip tape if the original piece is missing.
- Small scissors, used only at the end if trimming is needed.
- A dry cloth to wipe the handle.
- A clean table or bench so the grip does not collect dust before it goes on.
Most overgrips have a tapered starting end. Some have a small sticky tab at that end, while others rely mainly on tension and the finishing tape. Check the grip in your hand before you remove all the backing, because once the material starts sticking to itself it is much easier to crease.
Step 1: Take off the old overgrip properly
Peel away the finishing tape first, then unwind the old overgrip from the top of the handle down towards the butt cap. Try not to yank it off in one motion, because that can pull at the base grip underneath and leave you with a messy surface.
If there are small bits of tape left behind, rub them away with your thumb or wipe them with a dry cloth. You do not need to make the handle look brand new, but you do want it free from loose edges that could form lumps under the fresh wrap.
Do not remove the original replacement grip unless it is damaged or you deliberately want to change the handle feel. For most beginners, the overgrip is the thin outer layer that gets sweaty and worn; the base grip underneath should stay in place.
Step 2: Find the correct starting end
Look for the narrow or angled end of the new overgrip. That is normally the part designed to sit at the bottom of the handle, just above the butt cap. If there is a small sticky patch, peel only that section first and leave the rest of the backing attached for now.
Place the starting end so it sits neatly around the base of the handle without hanging below the butt cap. If it is too low, it can rub against your palm. If it is too high, you lose useful handle coverage and may run short near the top.
Step 3: Lock in the first turn
The first wrap is where most waste happens. Hold the starting end firmly with your thumb and make one full turn around the base of the handle. Keep the material flat, not folded, and pull with gentle tension so it grips the shape of the handle.
You are looking for snug, not stretched thin. Pulling too hard can narrow the overgrip, reduce cushioning and make the finish uneven. Pulling too softly can leave air pockets and cause the grip to twist during play.
After the first turn, pause and check the bottom edge. It should look tidy and feel stable. If it already looks crooked, unwind that first turn and reset it. Fixing it now saves far more material than trying to rescue a poor angle halfway up the handle.
Step 4: Wrap with a small, consistent overlap
Work your way up the handle, overlapping each turn by roughly 3–5 mm. The exact overlap does not need to be perfect, but it should be consistent. Too much overlap makes the handle thick and can leave you short at the top. Too little overlap can create gaps where the base grip shows through.
Keep peeling the backing away gradually as you wrap. This keeps the unused part clean and easier to control. Rotate the racket rather than waving the grip around in the air; it gives you better control and reduces twisting.
Every few turns, run your fingers lightly over the wrapped section. If you feel a ridge, crease or bubble, unwind just that small section and rewrap it. Do not wait until the end, because correcting one turn is much easier than correcting the whole handle.
Step 5: Choose the direction that feels smooth in your hand
Overgrip direction can feel personal. The simplest beginner check is to hold the racket as if you are about to play a forehand and slide your hand slightly. The overlaps should feel smooth under your fingers rather than catching like tiny steps.
If the ridges feel awkward, you may have wrapped in a direction that does not suit your hand position. It is better to notice this early. Before you tape the end, grip the racket normally, move through a few slow shadow swings and check that your palm does not drag against the overlap.
If your racket still feels uncomfortable even with a tidy grip, the issue may be handle size, weight balance or racket choice rather than your wrapping technique. For broader fit decisions, see how to choose a starter padel racket without overspending.
Step 6: Finish without cutting too much
When you reach the top of the handle, stop before the overgrip starts climbing onto the throat of the racket. Hold the loose end flat and mark where it should finish. If there is a printed or pre-cut finishing angle, follow that. If not, use scissors to cut a neat diagonal so the end sits flush.
Do not cut the grip before checking the final position. Beginners often remove too much, then discover the last turn does not quite reach the top. A diagonal cut also looks tidier than a blunt straight cut and is less likely to lift at the edge.
Wrap the finishing tape around the top edge with enough tension to hold the overgrip down, but not so tightly that it squeezes the material into a ridge. One clean layer is usually enough. If you need several messy layers of tape, the grip probably ended too unevenly and is worth redoing from the last few turns.
Common mistakes that waste overgrips
- Peeling all the backing off at once: the grip sticks to itself, picks up dust and becomes harder to wrap cleanly.
- Starting too high on the handle: you lose coverage at the bottom and may end up with unused material at the wrong end.
- Using a heavy overlap: the handle becomes bulky and the grip may run short before the top.
- Pulling as hard as possible: this can distort the material and make the feel inconsistent.
- Ignoring the first crooked turn: a small angle error at the base becomes a bigger problem higher up the handle.
- Finishing with too much tape: tape should secure the end, not fix poor wrapping.
How to know you have done it right
A good overgrip feels even from bottom to top. You should not feel raised lumps, exposed gaps or a loose flap near the finishing tape. When you squeeze the handle, the grip should stay put rather than rotating under your fingers.
Try a few gentle volleys against a wall or take some slow practice swings before your next game. If your hand relaxes and the racket face feels easier to control, the grip is doing its job. If you keep tightening your hand because the handle feels slick or unstable, recheck the overlap and the first turn.
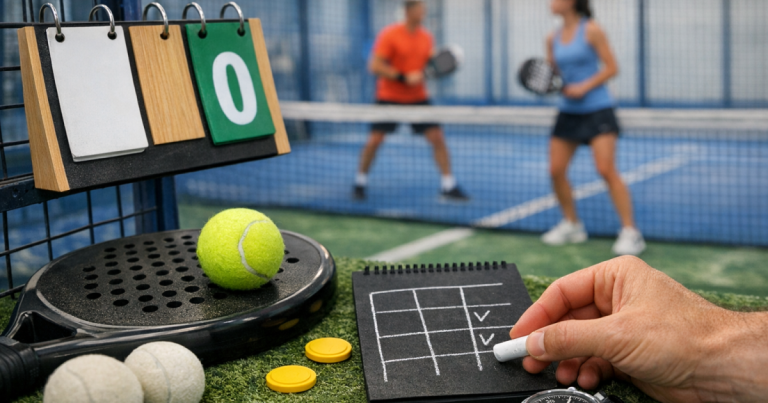
Grip comfort also affects simple match habits. When you are not distracted by a slippery handle, it is easier to focus on positioning, shot choice and the score. If match scoring still feels new, keep this first-match scoring guide handy before your next club game.
Making the grip last longer
Overgrips wear out faster when they stay damp in a closed bag. After playing, take the racket out at home and let the handle air naturally. Avoid leaving it pressed against wet clothing or towels.
If your hands sweat a lot, carry a small towel and dry your palm between games. That is cheaper and less wasteful than changing grips early because they have absorbed too much moisture in one session.
Your bag matters too. A clean, aired bag helps grips, towels and clothing stay fresher between sessions. For simple habits after club nights, read how to stop your padel bag smelling after matches.
Things readers ask
How often should I change an overgrip?
Change it when it feels shiny, slippery, flattened or unpleasant to hold. Some players need a new one after a few hard sessions; others can keep the same one longer if they play less often and dry it properly.
Can I reuse an overgrip if I wrapped it badly?
Usually only if you notice the problem straight away. Once the grip has stretched, creased or picked up fluff, it rarely feels as good on a second attempt.
Should I wrap over the old overgrip?
For a quick emergency fix, you can, but it makes the handle thicker. For a cleaner feel, remove the old overgrip first and wrap the fresh one over the base grip.
Why does my new overgrip feel bulky?
The overlap is probably too wide, or you may already have more than one layer on the handle. Remove old layers and rewrap with a smaller, steadier overlap.
Does the colour of the overgrip matter?
Not for performance in any reliable beginner sense. Lighter colours may show dirt sooner, while darker colours can look fresher for longer, but feel and comfort matter more.
What to remember
The best way to replace a padel overgrip without wasting it is to slow down at the start. Set the first turn neatly, peel the backing gradually, keep the overlap small and even, and do not trim until you are happy with the final position.
A fresh overgrip will not fix every part of your game, but it removes one common beginner distraction. When the racket feels secure in your hand, you can spend more attention on footwork, contact point and playing the next ball calmly.