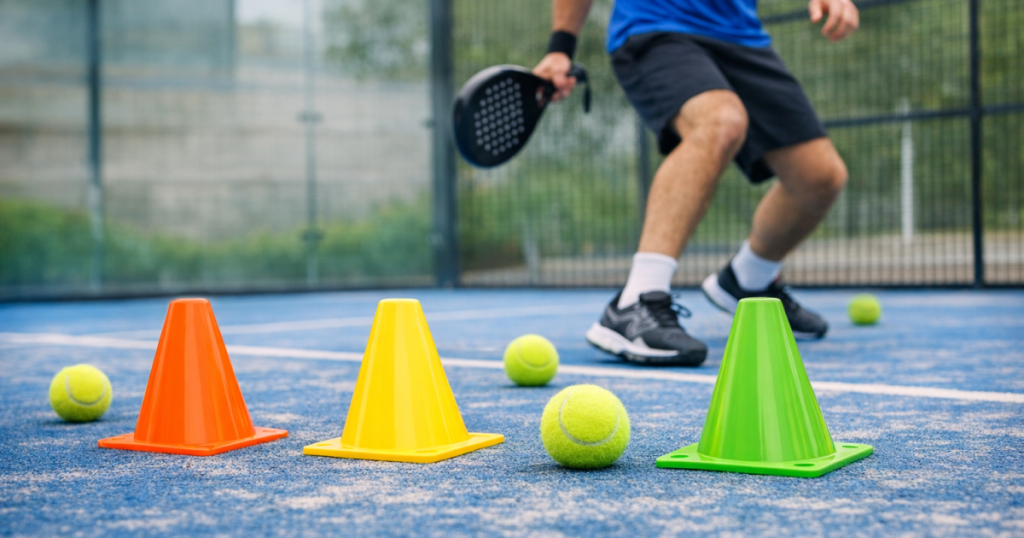
Training cones can be useful for padel movement drills because they turn vague footwork advice into clear targets you can see, reach and reset. They are not magic, and they will not fix late preparation on their own, but they can make solo practice and small-group coaching much more organised.
The key is to use cones as reference points, not as the main event. Good padel movement is still about split-stepping, reading the ball, recovering to a sensible position and staying balanced enough to play the next shot.
At a glance
- Cones are worth using if you struggle to recover, drift too close to the glass or lose your spacing after a shot.
- They work best for simple patterns: start position, first step, shot position and recovery point.
- Flat markers are usually better than tall cones on a busy club court because they are easier to move around and less intrusive.
- You do not need many. Four to six markers are enough for most beginner movement sessions.
- They are least useful when a drill becomes too rigid and stops looking like real padel.
If you are still getting ready for regular club sessions, it is worth pairing movement practice with the basics in this padel starter checklist, so your kit, booking routine and rules knowledge are not holding you back.
Why cones help beginners move with more purpose
Beginners often hear advice such as “recover quicker”, “stay compact” or “move as a pair”. Those cues are useful, but they can feel abstract when you are on court and the ball is coming back faster than expected. A cone gives the cue a physical location.
For example, if you keep finishing volleys too close to the net, a marker behind you can remind you where to recover. If you are defending deep and forget to move back towards the middle, a marker can show the space you are trying to reclaim. This makes padel movement drills easier to repeat, review and adjust.
Cones also help you separate movement from shot quality. During normal points, a poor contact can distract you from the footwork that caused it. With a simple cone pattern, you can ask: did I split-step, did I take the first step in the right direction, and did I recover before the next feed?
When training cones are genuinely worth using
Training cones are most helpful when the goal is clear. They are less helpful when they are scattered around the court without a plan. Before you put any markers down, choose the habit you want to improve.
Use cones when you need better recovery
Recovery is one of the biggest differences between casual hitting and proper padel. After a volley, lob defence or wall shot, many new players admire the ball for half a second too long. A cone can mark the position you are trying to return to, so recovery becomes part of the drill rather than an afterthought.
Use cones when your spacing keeps changing
Beginners often creep forwards, stand too square, or drift into a partner’s side without noticing. Markers can make spacing more obvious. They are especially useful in pairs, where both players need to understand who covers the middle and how close they should be after a shot.
Use cones when you practise without a coach
Solo or partner-led practice can become messy quickly. Cones give the session structure. Even if the drill is simple, such as moving from a ready position to a defensive corner and back, a visible target keeps the repetition honest.
When cones are not the answer
Cones are not worth much if they make your movement robotic. Padel is not a straight-line sprint sport. You are constantly adjusting to ball height, spin, glass rebounds, partner position and opponent pressure. If every drill becomes a fixed route between four markers, you may get fitter without becoming better at moving in points.
They are also not a substitute for ball judgement. A player who moves quickly to the wrong place is still out of position. Use cones to support decision-making, not to avoid it.
There is also a practical club-court point: keep markers tidy and out of other players’ way. If you are sharing a court, waiting between games or using a public booking slot, choose low-profile markers and clear them away quickly when the drill ends.
How to set up a useful cone drill
Keep the setup simple. A good beginner drill should be easy to explain in under a minute and easy to reset after each repetition.
Step 1: Choose one movement problem
Do not try to fix everything at once. Pick one theme for the session, such as recovering after a volley, defending the back corner, moving forwards after a lob, or staying connected with your partner. If you cannot explain the aim clearly, the drill probably needs simplifying.
Step 2: Use the court lines first
Padel courts already give you useful reference points: the service line, side glass, back glass and net. Use cones to add clarity, not clutter. For most drills, place markers around one to two metres from an existing line rather than measuring exact distances. The aim is repeatable movement, not laboratory precision.
Step 3: Start at walking speed
Run through the route slowly before adding a ball. Check whether the movement feels like padel: small adjustment steps, a balanced set position and a quick recovery. If the drill feels like a gym shuttle run, change it.
Step 4: Add a feed or shadow swing
Once the route makes sense, add a gentle feed from a partner or a shadow swing at the cone. The shot does not need to be powerful. In fact, slower feeds often make the movement easier to notice and correct.
Step 5: Review one thing at a time
After five or six repetitions, pause. Ask one focused question: did I split-step before moving, did I arrive balanced, or did I recover in time? Avoid giving yourself five corrections after every attempt. That usually leads to rushed, stiff movement.
Simple cone drills that feel like real padel
These examples are designed for beginners and early club players. You can use flat markers, small cones, spare balls or any soft, visible object that will not damage the court.
Split-step and first-step drill
Place one marker where you start and two markers diagonally in front of you, roughly where you might move for a forehand or backhand volley. Start in your ready position. As your partner signals left or right, split-step, move to the correct marker, shadow the volley and recover to the start.
The aim is not speed at first. Focus on reacting after the split-step rather than guessing early. This builds the habit of being loaded and ready before the ball arrives.
Back-corner defence and recovery
Place one marker near your defensive ready position and another towards the back corner, leaving enough space to move comfortably without crowding the glass. Start at the ready marker, move to the corner, shadow a controlled defensive shot, then recover.
This is useful if you get stuck deep after playing off the glass. The cone reminds you that the shot is only half the job; you still need to return to a position where you can cover the next ball.
Volley, retreat and reset
Place one marker near your volley position and one a little deeper. Start at the deeper marker, move forwards for a controlled volley, then recover back rather than standing flat-footed at the net. This helps beginners who attack the net well but then become too static.
Partner spacing drill
Place two markers across the court to show the rough spacing between you and your partner. Move side to side together without hitting first, then add gentle feeds. The aim is to keep a sensible gap, avoid both players chasing the same ball, and recover as a pair.
If you like structured drill ideas, the discussion in the PadelMBA beginner drills review may help you decide which online drills are worth copying and which need adapting for your level.
How many cones do you actually need?
For most beginner sessions, four cones are enough. One can mark your starting point, one can mark the shot position, one can mark the recovery position and one can mark a partner’s spacing reference. Six gives you more flexibility, but more than that often creates clutter.
Flat disc markers are usually easier for padel than taller sports cones. They are less distracting, easier to step around and simpler to pack in a bag. Tall cones can still work for off-court warm-ups, but on court they can feel unnecessary unless a coach is running a very specific exercise.
You do not need branded cones to make the drill effective. The important checks are visibility, softness, portability and whether they stay put during normal movement. If markers slide too much on the court surface, use fewer and place them where they are less likely to be clipped.
Mistakes that make cone drills less useful
- Turning every drill into a race: Fast feet are useful, but only if you arrive balanced enough to play the ball.
- Ignoring the racket: Movement and racket preparation should happen together. Do not sprint to a cone with your racket hanging behind you.
- Making the pattern too neat: Real padel includes awkward balls, small adjustments and recovery under pressure. Add variation once the basic route is comfortable.
- Using too many markers: A crowded court makes the drill harder to understand and easier to trip over.
- Forgetting your partner: In doubles, your best position depends on where your partner is. Cone drills should not train you to move as if you are playing singles.
How to know if the drill is working
A cone drill is working if your movement during points starts to look calmer and earlier. You should notice that you recover sooner, leave yourself more space from the glass, and arrive at shots with your body under control.
It is not working if the drill feels impressive but your match movement stays the same. In that case, simplify the setup and connect each repetition to a real padel situation. For example, instead of “run to the cone”, think “defend the back glass, play the ball, recover to cover the middle”.
You can also track progress with very simple notes after a session. Write down one movement habit you improved and one that still broke down in points. That is more useful than counting hundreds of repetitions without knowing whether they transferred into play.
Bringing cones to a club session without making a mess
If you carry cones to a club session, keep them in a small pouch or side pocket so they do not spill into your bag. A few loose markers mixed with grips, balls and keys can become annoying quickly, especially when you are trying to get on court for a timed booking.
For a tidier setup, the ideas in this guide to stopping loose accessories rattling in your padel bag are useful for cones, spare balls, overgrips and other small items.
On court, explain the drill before placing every marker. Put cones down only when you are ready to use them, then collect them straight away. This keeps the session flowing and avoids turning a casual hit into a complicated coaching circuit.
Common questions
Can I use spare balls instead of cones?
Yes, spare balls can work as visible markers, but they roll if clipped and are easy to confuse with balls in play. They are fine for slow movement practice, but flat markers are tidier for repeated padel movement drills.
Should beginners practise movement without hitting a ball?
Yes, for short periods. Shadow movement helps you learn the route and recovery point without worrying about contact. Add a ball fairly quickly, though, because movement only becomes useful when it connects to timing, shot choice and recovery.
Are cones useful for fitness as well as footwork?
They can be, but the goal matters. Fitness drills can improve sharpness, yet padel movement should still include balance, racket preparation and realistic recovery. Do not let fitness work replace court-specific habits.
How long should a cone drill last?
Short blocks usually work best. Try two or three minutes, pause for feedback, then repeat with one adjustment. Long blocks often become sloppy, and once your movement quality drops the drill becomes less valuable.
What stands out
Training cones are worth using when they make movement clearer, simpler and more repeatable. They are not essential, and they should not turn padel into a rigid obstacle course, but they are a handy tool for beginners who want better recovery, spacing and court awareness.
Start with four markers, one clear movement goal and slow repetitions. Once the route feels natural, add a ball and make the pattern more realistic. If the drill helps you move earlier and recover better during points, the cones are doing their job.