A wrinkled overgrip is annoying because you feel every ridge when you serve, volley or block at the net. Once you know how to change a padel overgrip, the job takes only a few minutes and makes the racket feel cleaner, steadier and less distracting in your hand.
The trick is not strength. It is starting at the right angle, keeping light tension on the tape, and checking the overlap before you rush to the top of the handle.
The short version
- Remove the old overgrip fully and wipe the handle dry before you start.
- Begin at the butt cap with the tapered end of the new overgrip.
- Wrap upwards on a diagonal, keeping the material smooth but not stretched thin.
- Overlap each turn by about 1–2 mm so there are no gaps or bulky ridges.
- Finish with the supplied finishing tape, then test the handle with your normal playing grip.
What you need before you start
You do not need a workbench or specialist tools. A clean table, a fresh overgrip, and a pair of scissors are enough for most rackets. If the old grip has left sticky residue, use a dry cloth first. Avoid soaking the handle, as moisture trapped under the grip can make it feel soft or uneven later.
Before you remove anything, look at how your current overgrip sits. Notice the direction it travels, how much it overlaps, and where the finishing tape ends. This quick look gives you a useful reference, even if the old job was not perfect.
If you are still unsure whether your handle feels too thick, too thin or simply worn, it is worth reading padel racket grip, handle size and overgrips explained before adding extra layers. Too many overgrips can make it harder to relax your hand, especially for beginners learning volleys and bandejas.
Step 1: Remove the old overgrip properly
Start by peeling off the finishing tape at the top of the handle. Then unwind the overgrip slowly rather than ripping it away in one pull. If the grip has been on for a while, it may tear or leave adhesive marks near the butt cap.
Once it is off, check the base grip underneath. A base grip is usually thicker and more permanent than an overgrip. If it is still secure and reasonably smooth, leave it in place. If it is badly damaged, loose or crumbling, that is a different job from a normal overgrip change.
Wipe the handle with a dry cloth. The aim is simply to remove sweat, dust and loose bits of old tape. A dry, even surface gives the new overgrip a better chance of sitting flat.
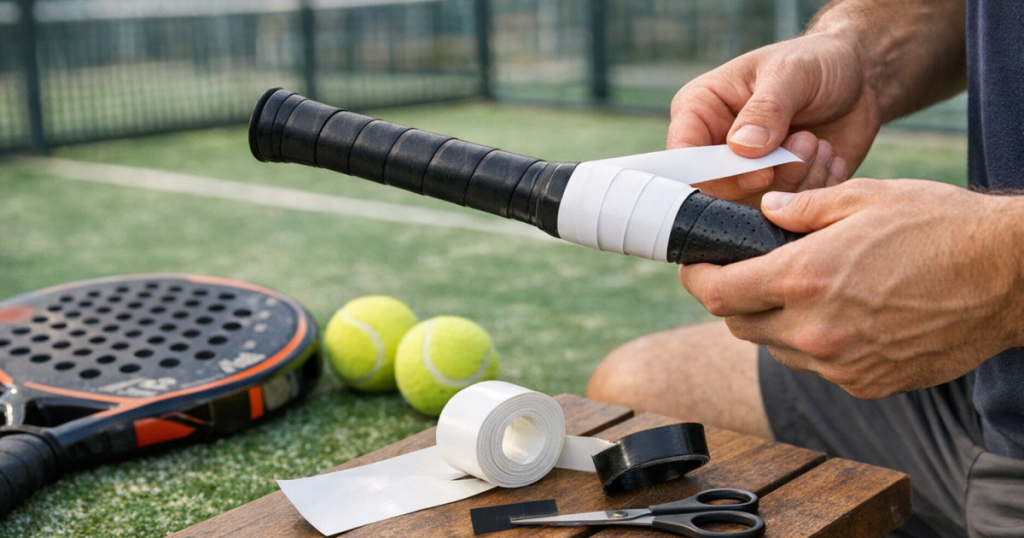
Step 2: Find the tapered end and set the angle
Most overgrips have one narrow or tapered end. That end should start at the bottom of the handle, close to the butt cap. If there is a small adhesive tab, peel off the backing and press it down firmly.
The first wrap is the most important part of the whole job. Place the tapered end at a slight diagonal rather than straight across the handle. If you start too flat, the grip will bunch up quickly. If you start at too steep an angle, you may run out of material before reaching the top.
A good beginner check is to make the first turn snug around the butt cap without covering it in a big lump. You want a secure start, not a thick ridge that your little finger keeps catching during play.
Step 3: Keep steady tension, not maximum tension
Wrinkles often appear because the overgrip is either too loose or pulled too hard. Too loose, and the material folds as it turns around the handle. Too tight, and it stretches thin, twists, or creates uneven pressure marks.
Hold the racket handle in one hand and the roll of overgrip in the other. Turn the racket slowly while keeping gentle tension on the material. Think of smoothing it into place rather than stretching it into place.
After the first two turns, pause and look at the surface. If you can already see a crease, unwind back to the problem area and correct it. It is much easier to fix a wrinkle early than once the whole handle is wrapped.
Step 4: Overlap consistently as you move up the handle
As you wrap upwards, aim for a small, even overlap on every turn. Around 1–2 mm is a useful guide for most overgrips. This is enough to avoid gaps without making the handle feel bulky.
Watch the lower edge of the material as it crosses the previous layer. If the overlap keeps getting wider, reduce your angle slightly. If you can see the base grip between turns, increase the overlap a little.
Try not to stop and restart with the overgrip hanging loose. If you need to pause, hold the wrap in place with your thumb. Loose pauses are a common reason the next turn starts with a small fold.
Step 5: Smooth corners and handle shape as you go
Padel handles are not perfectly round. They have edges, and those edges can make the overgrip lift if you rush. As the material passes each edge, guide it down with your thumb before making the next turn.
If your racket has a wrist strap fixed near the base, make sure the first wrap sits neatly around it and does not trap it in an awkward position. The strap should still hang naturally when you finish.
Beginners sometimes try to hide wrinkles by pressing them flat after the grip is complete. That rarely works. A crease trapped under later layers usually stays there. If you see one, unwind a few turns, flatten the material and rewrap with calmer tension.
Step 6: Finish neatly at the top
When you reach the top of the handle, you may have a little extra material left. Some overgrips are supplied with a tapered finishing shape; others finish square and need trimming. If you trim it, cut at a diagonal so the end sits neatly around the handle rather than forming a blocky edge.
Use the finishing tape to secure the final edge. Pull the tape around smoothly, but do not pull so hard that it squeezes the grip into a ridge. The finishing tape only needs to hold the end in place.
Once taped, run your hand from the butt cap to the top of the handle. You are feeling for raised edges, soft pockets, gaps or sticky seams. Then hold the racket as if you are about to serve. If your hand naturally settles without catching on a ridge, the wrap is probably in good shape.
Common causes of wrinkles
The starting angle is too flat
A flat start forces the overgrip to climb awkwardly, which creates folds near the butt cap. Restart with a clearer diagonal and a smaller first overlap.
The material is being pulled unevenly
If you tug hard on one turn and barely pull the next, the grip will not sit consistently. Keep the same light tension from bottom to top.
The overlap changes too much
Wide overlaps create bulky ridges. Tiny overlaps can leave gaps. Use the previous turn as your guide and make small corrections as you go.
The old grip was left underneath in poor condition
An overgrip can only sit as smoothly as the surface below it. If the base grip is loose, twisted or badly worn, a fresh overgrip may still feel lumpy.
How often should you replace it?
There is no single schedule for every player. A new player playing once a week may get several sessions from an overgrip, while someone playing regular club nights might change it more often. The better test is feel.
Replace it when the handle feels slippery, shiny, flattened, dirty, or unpleasantly hard. Also change it if you keep gripping tighter than normal because you do not trust the racket in your hand. Overgrips are small accessories, but they can affect how relaxed your swing feels.
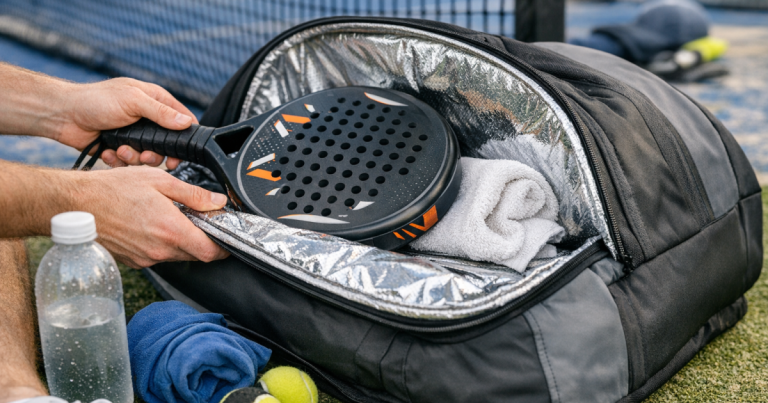
To make fresh grips last longer, keep your racket dry between matches and avoid leaving damp kit sealed in your bag. The habits in how to care for padel gear between matches will help you stop sweat and moisture from making your handle feel tired too quickly.
Quick pre-match grip check
Before you head onto court, do a simple 30-second check. It is easier to fix a loose end before the warm-up than during a close game.
- Check the finishing tape is still stuck down.
- Look for lifting edges near the top of the handle.
- Hold the racket with your normal forehand and backhand grips.
- Make two or three gentle shadow swings and feel for slipping.
- Check your wrist strap is free and not wrapped under the grip.
If you often change grips at the club, keep one spare overgrip, a small pair of scissors and a cloth in your padel bag. For a fuller match-night checklist, see how to pack a padel bag for club night.
Common questions
Should I remove the plastic film from a new overgrip?
Yes. Many overgrips come with a thin protective film on the outer surface. Peel it off before wrapping, otherwise the grip will feel slippery and will not perform as intended.
Which direction should I wrap the overgrip?
Start at the butt cap and wrap upwards towards the throat of the racket. The exact left-to-right direction can depend on your hand preference and the original wrap, but the key is a smooth diagonal with consistent overlap.
Can I put a new overgrip over an old overgrip?
You can, but it is usually better to remove the old one first. Layering overgrips makes the handle thicker and can hide lumps, sweat and loose edges underneath.
Why does my overgrip twist while I am wrapping it?
It is usually being pulled unevenly or allowed to dangle loose between turns. Keep the roll close to the handle and maintain gentle, steady tension as you rotate the racket.
Is a wrinkled overgrip worth redoing?
Yes, if you can feel the wrinkle when holding the racket. Small cosmetic marks are not a problem, but raised folds can distract your hand and encourage you to grip too tightly.
Main lessons
A smooth padel overgrip comes from patience more than pressure. Start with a clean handle, set the tapered end at a sensible angle, keep light tension, and use a small, consistent overlap all the way up.
If the first few turns look messy, do not try to rescue the job by pulling harder. Unwind, reset, and go again. After a couple of attempts, changing an overgrip becomes one of the easiest bits of padel kit care, and it can make your racket feel noticeably better before your next session.