Good court positioning often starts before the ball is even hit. When you learn padel split-step drills, you stop arriving late, reaching with your arm, or getting trapped too close to the glass. The split-step is a small timing hop that helps you land balanced, read the next shot, and move in the right direction with less panic.
In brief
The split-step is not a big jump. It is a light, controlled bounce onto the balls of your feet as your opponent is about to strike the ball. For beginners, the aim is simple: land just as the opponent makes contact, then push off towards the ball or recover into a smarter court position.
If you feel slow even when you are trying hard, your issue may not be fitness. It may be that you are moving before you know where the ball is going, or standing flat-footed when the shot comes. Split-step practice fixes that by linking your eyes, feet and recovery together.
How the split-step works in padel
A good split-step has three parts: prepare, land, then move. You prepare by staying light with your knees soft and your racket in front. You land as the opponent hits. Then you push off with the outside foot and take your first step towards the likely contact point.
In padel, this matters because the ball changes quickly after the glass, the net is close, and positioning is shared with a partner. A late first step can pull you out of shape, leave a gap down the middle, or make your next shot feel rushed.
The split-step also helps you avoid one of the most common beginner habits: drifting. Drifting means walking slowly towards the ball without a clear first movement. It feels active, but it often leaves you off balance. A well-timed split-step gives your movement a clean start.
Drill 1: shadow split-step timing
Start without a ball. Stand around the service line with your racket up and your feet slightly wider than hip-width. Ask a partner to stand opposite you and mimic a forehand or backhand swing. Your job is to land your split-step at the moment their imaginary racket would contact the ball.
- Begin with 10 slow swings so you can feel the timing.
- Keep the hop small; your shoes should barely leave the court.
- Land with your weight slightly forward, not on your heels.
- After landing, take one clear step left, right, forwards or backwards depending on your partner’s signal.
This drill builds rhythm without the pressure of returning a shot. It is useful before a match because it wakes up your feet and reminds you not to wait flat-footed.
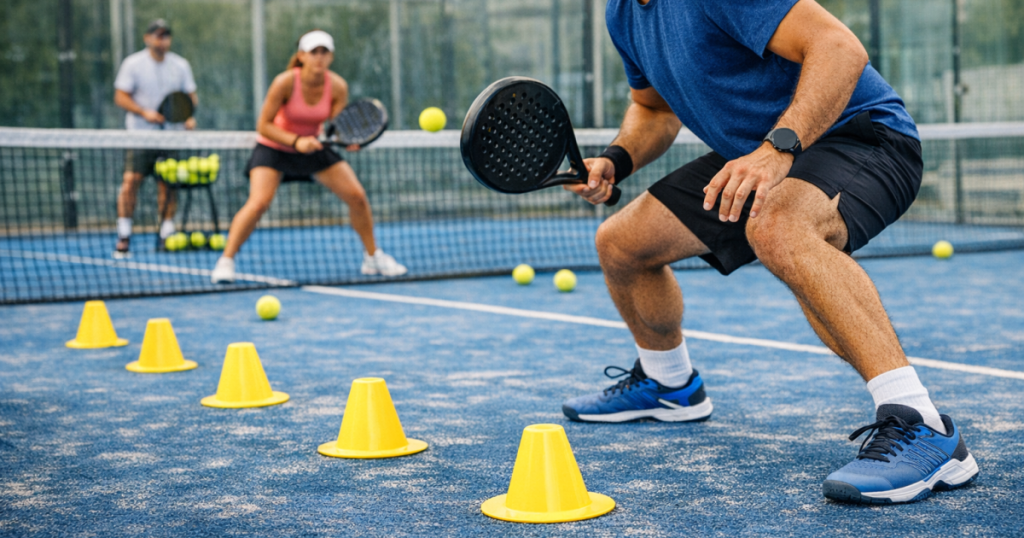
Drill 2: cone call and recover
Place four small markers in a diamond around you: one in front, one behind, one to the left and one to the right. If you do not have cones, use spare balls or flat markers. Stand in the middle, split-step as your partner claps, then move to the marker they call out.
Touch the marker with your racket hand or foot, then recover to the centre and reset. The important part is not sprinting. The important part is landing balanced, choosing the correct first step, and returning to a useful base position.
- Do 6 to 8 calls, then rest.
- Keep your head up rather than staring at your feet.
- Recover with small adjustment steps, not one lazy stride.
- Swap roles so both players practise calling and moving.
Once it feels comfortable, make the call later. Your partner should clap first, then call the direction as you land. That makes the drill closer to a real point, where you must react after the opponent’s contact rather than before it.
Drill 3: volley line split and hold
This drill connects movement to net positioning. Both players stand near the service line. One player feeds a gentle ball; the other split-steps as the feeder hits, steps forward, and plays a controlled volley. After the volley, the hitter holds their position for a second, checks balance, then recovers.
The hold is important. Many beginners rush through the volley and immediately fall sideways or backwards. Holding the finish shows whether you were balanced at contact. If you cannot hold, make the split-step smaller and shorten the first step.
If volleys feel like the next area to improve, the partner routine in these simple volley control drills pairs well with this footwork work.
Drill 4: glass recovery and split
Start a few steps in front of the back glass. Your partner feeds a comfortable ball that would make you move backwards or sideways. Let it come through gently, play a controlled return after the bounce if appropriate, then recover towards your starting zone and split-step again as your partner prepares the next feed.
This drill is less about hitting winners and more about not getting stuck at the back. After you play from near the glass, your feet should bring you back into a position where you can see the opponent, protect the middle, and help your partner.
- Keep feeds slow enough that you can complete the recovery.
- Use short adjustment steps after the shot instead of turning your back to the court.
- Reset your racket in front before the next split-step.
- Stop the drill if your movement becomes rushed and messy; quality matters more than volume.
Drill 5: two-player rally with a split-step rule
Play a cooperative cross-court rally. The rule is that both players must split-step every time the opponent hits. Do not worry about winning the point. Keep the rally at a pace where you can notice your timing.
After 2 minutes, pause and ask three questions: did you land before, during or after contact? Were you balanced enough to move both ways? Did you recover after your shot, or admire it? These questions are more useful than simply counting how many balls you kept in play.
When the rally becomes smoother, add a target. For example, both players try to keep the ball deep cross-court, or both try to play lower over the net. That gives your split-step a realistic purpose: move early enough to play a calmer shot.
Common mistakes to tidy up
Jumping too high
A split-step should be quick and light. If you jump high, you spend too long in the air and cannot change direction. Think of it as a bounce, not a leap.
Landing too early
If you land before the opponent has started the forward part of their swing, you may still be flat-footed when the shot actually comes. Watch the opponent’s racket, not just the ball.
Moving before reading the shot
Guessing can work occasionally, but it is a poor habit for new players. Split, read, then push. That order keeps you from overcommitting to one side.
Recovering to the wrong place
Better court positioning is not always the geometric centre of your side. It depends on where your partner is, where you hit the previous ball, and whether your team is attacking or defending. After every shot, recover to a position that helps cover the biggest danger.
How to fit these drills into a normal session
You do not need a full coaching court to improve this. Add 8 to 12 minutes before a friendly match or booking. Start with shadow timing, move into cone call and recover, then finish with a cooperative rally where the split-step rule stays in place.
If you are arranging extra court time specifically for practice, it helps to keep the session simple: one movement focus, one hitting focus and one short game at the end. For newer players sorting out where and how to play, the guide to booking a padel court in the UK can make practice planning less confusing.
A useful beginner structure is:
- 3 minutes: shadow split-step timing.
- 5 minutes: cone call and recover.
- 8 minutes: volley line split and hold.
- 10 minutes: cooperative rally with split-step rule.
- Final 10 minutes: friendly points where both players focus on recovery, not winners.
Checks that show it is working
You are improving when your first step feels calmer, not necessarily faster. Your shots should also feel less stretched because you are reaching the ball with your body behind it rather than only with your arm.
- You land as the opponent contacts the ball, not after the ball is already travelling.
- Your knees stay soft and your weight stays slightly forward.
- You can push left or right without taking an extra balancing step first.
- You recover after your own shot instead of watching it.
- Your partner has fewer big gaps to cover because your position is more predictable.
In real club games, this also makes you easier to play with. You will communicate better, cover space more sensibly, and avoid sudden last-second lunges into your partner’s area. If joining organised games still feels a bit daunting, this advice on joining a club padel game is a helpful next step.
Questions people ask
Should I split-step before every shot?
As a training habit, yes. In live points, it becomes more natural and less obvious, but the idea remains the same: be light and ready as the opponent hits.
How big should the movement be?
Small. Your feet should separate slightly and land softly. If the movement makes you tired quickly or delays your reaction, it is probably too big.
Can I practise without a partner?
Yes. Shadow swings, wall feeds and cone movement can all help. A partner makes timing more realistic, but solo practice still builds balance and rhythm.
Why it matters
Padel rewards players who arrive in good shape more than players who simply run harder. The point of padel split-step drills is to make your first movement cleaner, your recovery more automatic, and your court positioning easier for your partner to trust.
Keep the drills short, repeat them often, and measure progress by balance rather than speed. If you can land well, read the shot, and recover into a sensible space, you will feel less rushed in rallies and more comfortable stepping into regular club play.