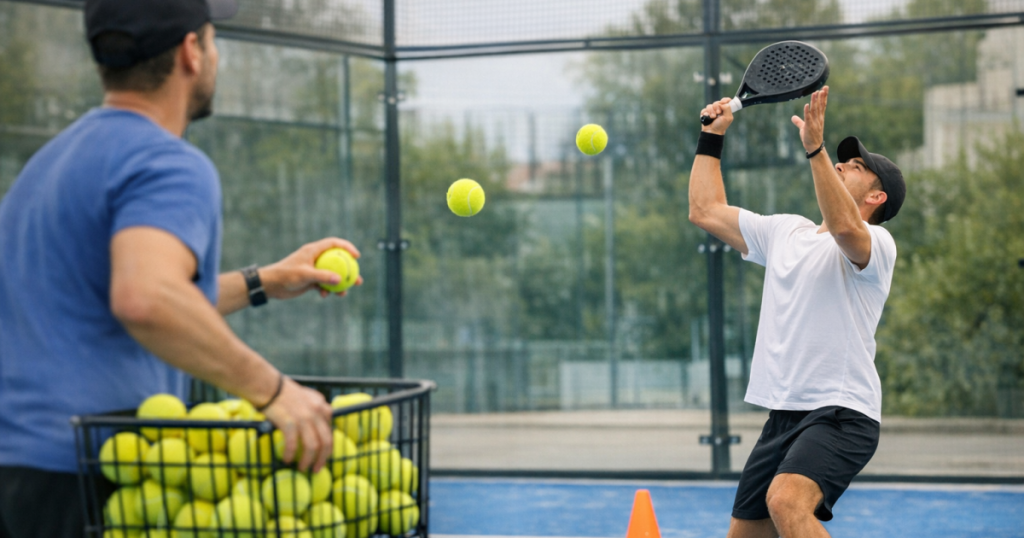
The bandeja is easier to learn when you stop trying to hit it at full speed. Simple bandeja timing drills help you recognise the ball earlier, move under it, and make calm contact before the bounce drops too far. The aim is not a flashy winner; it is a controlled shot that buys time and keeps your team near the net.
Before you start feeding overhead balls, spend a few minutes raising your body temperature, loosening your shoulders and rehearsing split steps. If you are new to match preparation, this guide to warming up safely before your first padel game is a useful habit to build into every session.
In brief
- Practise the bandeja with slow, predictable feeds before adding height, spin or movement.
- Time your split step as the feeder starts the lob, not after the ball is already above you.
- Move back early, turn side-on, and contact the ball slightly in front of your hitting shoulder.
- Measure success by control and recovery position, not power.
- Use short sets of 6 to 10 feeds so your technique stays tidy.
Why timing matters more than force
Beginners often miss the bandeja because they wait too long. The ball climbs, the player backpedals, the racket drops late, and the contact happens beside or behind the body. From there, it is hard to guide the ball deep or recover to the net.
Good timing starts before the swing. You need to read the lob, make a small split step, turn your shoulders, and create space while the ball is still rising. That gives you a calmer strike and lets the racket travel through the ball rather than chopping down in panic.
A well-timed bandeja does not need to be fast. For early-stage players, a useful target is a medium-paced ball that travels cross-court, stays low after the glass or side wall, and gives you enough time to move forward again.
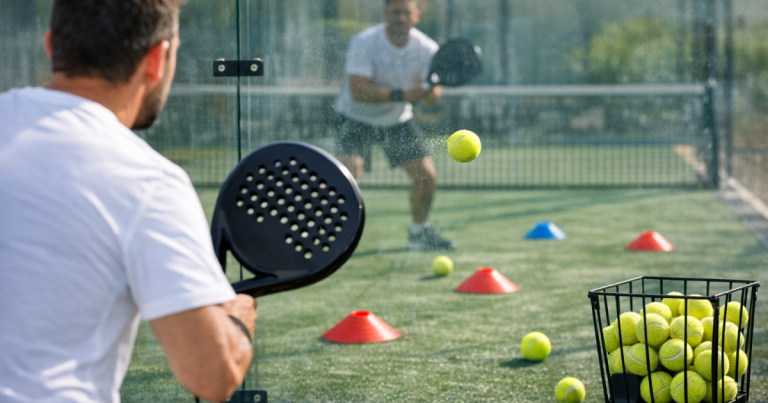
Set up the feed drill properly
You only need two players, a few balls and one half of the court. The feeder stands around the service line on the opposite side and sends gentle lobs towards the hitter, who begins close to the net. Keep the first feeds soft and repeatable rather than trying to recreate a difficult match lob straight away.
- Feeder position: near the service line, slightly cross-court from the hitter.
- Hitter start position: one to two metres behind the net, in a ready stance.
- Feed height: high enough to make the hitter move back, but not so high that the drill becomes a chase.
- Target area: deep cross-court, aiming for control rather than speed.
- Set length: 6 to 10 feeds, then swap roles or rest briefly.
If the feed is too flat, the hitter will practise a volley rather than a bandeja. If it is too high or too deep, they will spend the drill surviving rather than learning timing. The sweet spot is a ball that gives the hitter time to move, turn and strike with balance.
Drill 1: split-step and freeze
This first drill removes the pressure of hitting. The feeder sends a gentle lob. The hitter split steps as the feeder makes contact, turns side-on, moves back, and freezes in the ideal hitting position without swinging.
The freeze should show three things: the non-hitting shoulder points roughly towards the target, the racket is up early, and the ball would be contacted slightly in front of the hitting shoulder. Hold the position for one second, then reset.
Run 8 to 12 feeds. This looks basic, but it teaches the part many beginners skip: preparing before the ball drops. Once the freeze feels organised, add a slow shadow swing after the ball bounces or is caught.
Drill 2: catch the ball in the contact zone
Now the hitter tracks the ball with the non-hitting hand and catches it where they would normally strike it. Use the same gentle feed. The goal is to catch the ball just in front of the body, around head to shoulder height, with the body turned rather than square to the net.
If the player catches the ball above or behind their head, they are late. If they catch it too far to the side, they are not creating enough space. This catch drill is a quick way to make timing visible without worrying about racket technique.
- Good catch: in front of the hitting shoulder, with balanced feet.
- Late catch: behind the head, usually followed by leaning backwards.
- Crowded catch: too close to the body, often caused by small recovery steps.
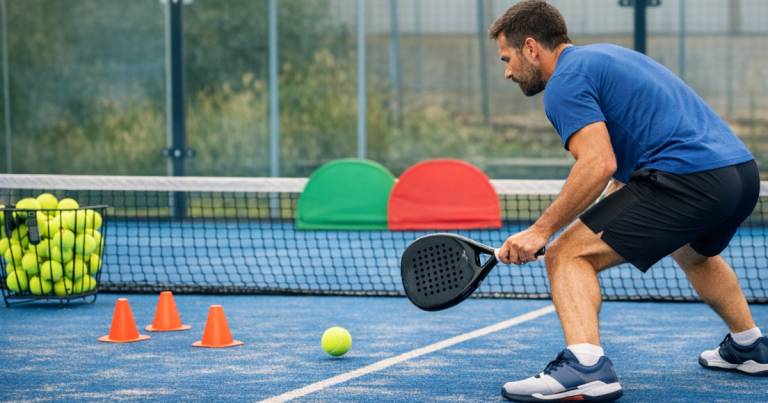
Drill 3: controlled contact to a deep target
Bring the racket back in. The feeder sends the same lob, and the hitter plays a slow bandeja cross-court. Use a deep target zone, such as the last two metres of the court, rather than aiming at a tiny spot. For beginners, a generous target keeps the drill realistic and reduces tension.
Think of the swing as firm and guided, not rushed. The racket starts up early, the body turns, and the contact happens in front. After contact, the hitter should take two or three recovery steps forwards, ready to defend the net again.
Do not count only successful balls. Also count clean preparation. A feed where the player moves early, contacts in front, sends a controlled ball and recovers forward is a good repetition, even if the exact landing point is not perfect.
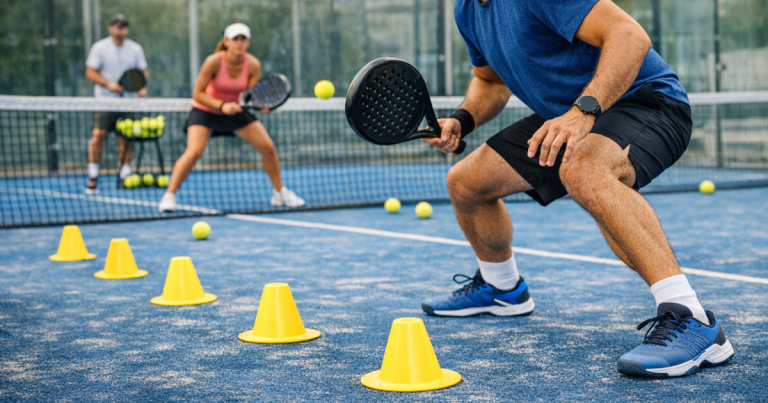
Drill 4: add one recovery step before the feed
Once the static version works, make the drill feel closer to a club rally. The hitter starts at the net, takes one small recovery step as if finishing a volley, then reacts to the feed. This teaches the player not to stand still waiting for lobs.
The feeder should still keep the ball kind. The added movement is enough. If the hitter begins to rush, reduce the feed speed again. The aim is rhythm: split, turn, move, contact, recover.
A useful pattern is two feeds to the same side, then a short break. Avoid long baskets where the hitter gets tired and starts swinging with the arm only. Quality repetitions matter more than volume.
Drill 5: call the contact point
This drill builds awareness. As the ball arrives, the hitter says “front”, “level” or “late” immediately after contact. The shot result matters less than honest feedback. Over time, players learn what a good contact point feels like.
If most calls are “late”, the hitter should split earlier and turn sooner. If most are “level”, ask them to move half a step more so the ball sits in front. If they are consistently calling “front” and sending the ball deep with control, the timing is improving.
Common timing mistakes to fix
- Backpedalling in a straight line: turn side-on first, then move. This keeps balance and protects the contact point.
- Waiting under the ball: create space early. Standing directly below the lob makes the swing cramped.
- Hitting too hard: power hides timing problems in practice and creates errors in matches.
- Dropping the racket: keep the racket prepared high so the swing is shorter and calmer.
- Forgetting to recover: the bandeja is not finished until you are moving forwards again.
If you keep losing the net after overheads, it can help to book a short coached session and ask specifically for feedback on your preparation and contact point. The LTA Find a Coach tool for booking padel lessons can be a sensible next step if you want a qualified pair of eyes on the movement.
How to make the feeds harder without breaking the drill
Only increase difficulty when the hitter can control at least 6 out of 10 feeds. Change one variable at a time. If you make the feed higher, deeper and faster all at once, you will not know what caused the mistake.
- Add height: make the lob climb a little more so the hitter must judge the drop.
- Add depth: feed closer to the back glass, but keep enough space for a clean swing.
- Add direction: alternate slightly left and right so the hitter adjusts their feet.
- Add a target: ask for cross-court depth, then later aim towards the side wall or back corner.
- Add a live follow-up: after the bandeja, play one extra ball so recovery becomes meaningful.
When the feed reaches the back glass, the bandeja starts to connect with defensive skills too. If that part of the court still feels rushed, spend time on simple back glass shot drills so you are not trying to learn every recovery movement at once.
A simple 20-minute practice plan
Here is an easy structure for two beginners sharing one court. Keep the pace relaxed and swap roles often so the feeder stays accurate.
- Minutes 1 to 4: split-step and freeze, 8 feeds each.
- Minutes 5 to 8: catch the ball in the contact zone, 8 feeds each.
- Minutes 9 to 14: controlled bandeja to a deep cross-court target, 10 feeds each.
- Minutes 15 to 18: add one recovery step before the feed, 6 feeds each.
- Minutes 19 to 20: each player names one timing cue that helped most.
Good cues are short. Try “turn early”, “racket up”, “contact in front” or “recover forwards”. Pick one cue per set rather than thinking about five things at once.
FAQ
How often should beginners do bandeja timing drills?
Once or twice a week is enough for most beginners, especially if the sets are short and focussed. Ten clean minutes before a friendly match can be more useful than a long, tired basket session.
Should I practise bandeja feeds before I can smash?
Yes. The bandeja is usually more useful for beginners than a smash because it helps you keep court position. You can learn both, but the bandeja should feel controlled before you chase power.
Where should the ball land during beginner feed drills?
Aim deep cross-court with medium pace. Do not worry about perfect corners at first. A safe, repeatable ball that gives you time to recover is the right early target.
What if I keep hitting the bandeja into the net?
You may be contacting too low, swinging down too sharply, or rushing the preparation. Slow the feed, prepare the racket earlier, and guide the ball forwards rather than chopping at it.
Can I practise this alone?
You can shadow the movement alone, but timing improves faster with a feeder because you need to read a real ball. If you are solo, rehearse the split step, shoulder turn and recovery steps without hitting.
Main lessons
The bandeja becomes much easier when the feed is simple and the goal is clear. Start by learning when to split, how early to turn, and where the contact should happen. Then add the swing, the target and the recovery steps one layer at a time.
For beginner padel players, the most useful bandeja is not the hardest one. It is the one you can repeat under pressure, send deep with control, and use to hold the net in your next club game.