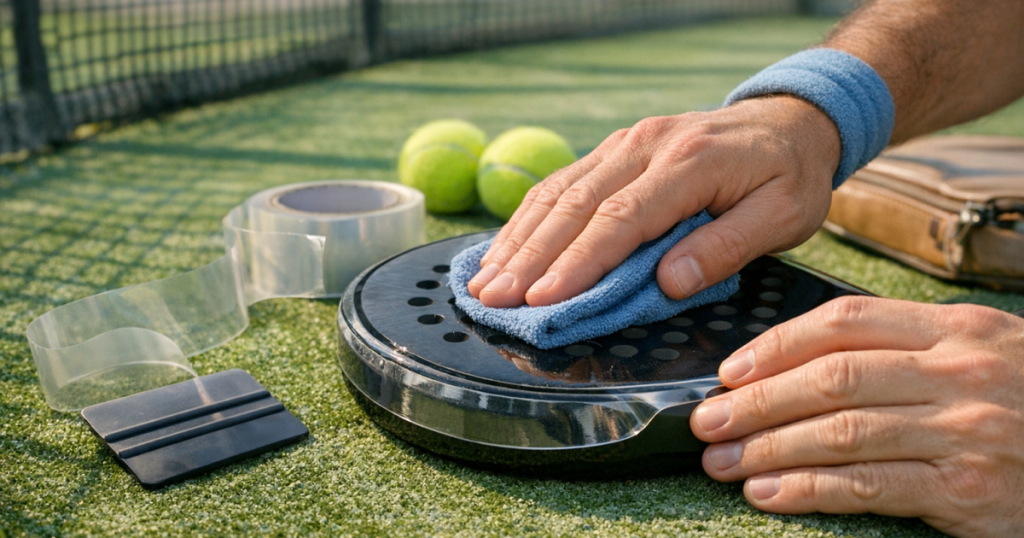
A fresh protector can save the top edge of your racket from those little glass-wall and court-surface scrapes, but it only works neatly if it goes on flat. The key with a padel racket protector is to clean the frame, start from the exact centre, and press outwards slowly instead of trying to stick the whole strip down at once.
For beginners, the main goal is not a showroom-perfect finish. It is a secure, smooth strip that follows the curve of the racket, stays clear of the face, and does not lift after your first few games.
The short version
- Clean and dry the top edge of the racket before you start.
- Line up the middle of the protector with the middle of the racket head.
- Peel only a small section of backing at a time.
- Press from the centre towards each side, using firm thumb pressure.
- Lift and re-seat the strip early if you spot a bubble; do not keep pressing a trapped bubble further along.
- Leave the racket for a short while before playing so the adhesive can settle.
What you need before you start
You do not need a workshop setup. A clean table, good light and a few simple items are enough. If your racket is new, this is a nice job to do before its first club session. If you are still working out whether your current racket is worth protecting or replacing, it may help to read our guide to choosing a starter padel racket before spending more on accessories.
- A self-adhesive racket protector strip suitable for padel rackets.
- A clean microfibre cloth.
- A little mild soapy water on the cloth, if the frame is dirty.
- A dry cloth or kitchen towel.
- Good lighting so you can see dust, old adhesive and alignment.
- Optional: a bank card wrapped in a cloth to help smooth the strip gently.
Avoid strong solvents unless the protector brand specifically says they are safe for racket frames. Many beginners try to “deep clean” the edge and end up making the job harder than it needs to be. The surface simply needs to be clean, dry and free from grit.
Step 1: remove dirt and old adhesive
Hold the racket so the top edge is easy to inspect. The area you are covering is usually the curved section from roughly the 10 o’clock position to the 2 o’clock position, although some protectors run slightly further down the sides.
Wipe away dust, sand and ball fluff first. If there is old adhesive from a previous strip, rub it gently with your thumb or a damp cloth. Do not scrape the frame with a blade. Even a small nick on the edge can make the new strip sit unevenly.
Once clean, dry the frame properly. Adhesive does not like moisture, and tiny damp patches can create cloudy spots or raised areas that look like bubbles later.
Step 2: find the centre of the racket head
This is the step most people rush. Look at the bridge and the top of the frame, then identify the highest central point of the racket head. On many rackets, you can use the line through the handle and bridge as your visual guide.
Now find the centre of the protector strip. Some strips have a crease or mark from the packaging; if not, fold the backing very lightly without creasing the visible side. You only need a reference point, not a sharp fold.
Matching centre to centre helps the protector follow both sides evenly. If you start from one end, the strip often drifts, and by the time you reach the other side you are fighting the curve of the frame.
Step 3: peel back only the middle section
Do not remove the full backing in one go. Peel back a small section around the middle, about 3–5 cm. Keep the rest of the backing attached so the strip does not stick to your fingers, the table or the wrong part of the frame.
Place the exposed adhesive on the top-centre edge of the racket. Before pressing hard, check that the strip is sitting straight and that it is not creeping onto the hitting face. A protector should cover the exposed outer edge, not interfere with the playing surface.
Once you are happy with the position, press the middle down firmly with your thumb. This first contact point acts like an anchor for the rest of the fitting.
Step 4: press outwards in short sections
Work from the centre towards one side first. Peel another few centimetres of backing, then press the protector down using overlapping strokes from the middle of the strip towards the outer edges. Imagine pushing air away from the area you have just stuck down.
Keep the strip under light tension, but do not stretch it aggressively. Stretching can make the ends pull back later, especially around the tighter curve near the sides of the racket. The protector should be guided into place rather than forced.
When one side is done, return to the centre and repeat on the other side. This keeps the pressure balanced and reduces the chance of a diagonal wrinkle forming across the top.
Step 5: deal with bubbles before they spread
If you see a small bubble while fitting a padel racket protector, stop straight away. Lift the nearest unstuck or lightly stuck section, move back to the bubble, and press the strip down again from the centre of that area outwards.
For a tiny bubble near an edge, you can sometimes push the air out with your thumb or a cloth-wrapped card. Use gentle pressure and short movements. Do not jab at the bubble, and do not drag a hard card across the racket face.
A bubble in the middle of a fully stuck section is harder to remove cleanly. If the adhesive is still fresh, lift the strip slowly and re-seat it. If it has already gripped firmly, decide whether the bubble is cosmetic or likely to lift. A tiny flat bubble may not matter; a raised bubble on the edge is more likely to catch and peel.
Step 6: check the edges and finish the ends neatly
Run your thumb along both long edges of the strip. You are checking for lifting, folds and spots where dust may have been trapped. Pay extra attention to the ends of the protector, because they take a lot of rubbing when the racket goes in and out of your bag.
If the strip is slightly long and the product instructions allow trimming, use clean scissors and trim both ends evenly. Do not trim while the strip is floating loose; stick it down first, then make small adjustments. If the protector is pre-shaped, avoid cutting unless you are confident it will not affect how the end sits.
After fitting, leave the racket somewhere dry at room temperature for a short settling period. You do not need to treat it like delicate equipment, but it is sensible not to fit the strip five minutes before a match and then scrape it straight into the side glass.
Why bubbles happen
Most bubbles come from one of four things: dust, trapped air, moisture or stretching. Dust creates tiny raised points under the adhesive. Air gets trapped when the strip is pressed down too quickly. Moisture weakens the bond. Stretching makes the protector fight against the curve of the frame.
Temperature can play a part too. A very cold strip may feel stiff, while a warm one can feel more flexible. In normal indoor conditions in the UK, you should be fine. If the strip has been sitting in a cold car or bag, let it return to room temperature before fitting.
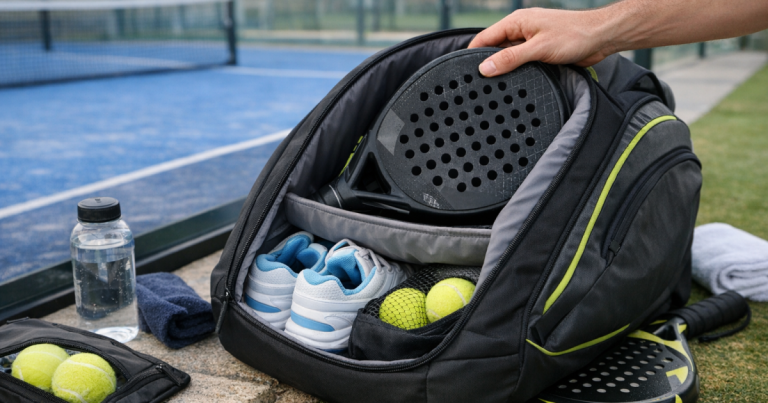
Storage matters once the protector is on. A racket that gets knocked around with shoes, balls and a water bottle will test the edges of any strip. If your bag has a temperature-resistant section, use it sensibly; our guide on how to use a thermal padel bag pocket explains what that compartment can and cannot do.
Quick checks before you play
- Alignment: the centre of the strip should match the centre of the racket head.
- Coverage: the top edge should be protected without covering the holes or main hitting area.
- Edges: both sides should feel smooth when you run a thumb along them.
- Ends: there should be no loose tabs that can catch inside your bag.
- Feel: the racket should still feel comfortable in hand. A protector adds a small amount of weight at the top, which some players notice more than others.
That last point is worth taking seriously. Some beginners like the slightly more protected, solid feel; others notice the extra head weight straight away. If your racket already feels hard to manoeuvre at the net, a thick protector may make volleys feel a little slower. It is not a reason to avoid protection, but it is a useful reminder that accessories can subtly change how your kit feels.
When to replace the protector
A protector does not need replacing just because it has a few scuffs. That is its job. Replace it when the edges are lifting, the strip has split, dirt is working underneath, or the adhesive has become uneven enough to catch on your bag or hand.
When removing an old padel racket protector, peel slowly rather than ripping it off. If residue remains, clean it patiently before fitting the next one. Putting a new strip over lumpy adhesive almost guarantees bubbles.
It is also a good time to look over the rest of your small accessories. If the racket feels slippery or the handle has become bulky from layered tape, our step-by-step guide to replacing a padel overgrip is a useful next job.
Things readers ask
Can I fit a protector to a used racket?
Yes, as long as the top edge is clean, dry and not badly damaged. Spend extra time removing old adhesive and grit, because used frames are more likely to trap dirt under the strip.
Should the protector cover the racket face?
No. It should sit on the outer edge of the frame. If it overlaps the hitting surface or covers holes, remove it and re-align before pressing it down fully.
Is one bubble a problem?
A tiny flat bubble is usually cosmetic. A raised bubble near an edge is more likely to lift, collect dirt and shorten the life of the protector.
Can I reuse a protector after peeling it off?
Usually not with a clean result. Once dust and skin oils touch the adhesive, it is much harder to reapply smoothly and securely.
Will a protector change how my racket plays?
It can, slightly. Because the strip sits at the top of the frame, some players notice a little extra head weight. Many beginners adapt quickly, but it is worth being aware of.
What to remember
A neat finish comes from patience more than specialist technique. Clean the frame, anchor the middle, peel the backing gradually and press air out as you go. If something looks wrong, fix it early rather than hoping it will flatten later.
Once you have fitted one protector carefully, the next one is much easier. It is a small accessory job, but it helps your racket stay tidier through the bumps and scrapes that come with learning padel.